How To Set Up Dedicated Servers for Windows and Linux For Your UE4 Game (using Windows)
This document covers the bare basics on how to get your Unreal Engine 4 game project able to build both Windows and Linux dedicated server builds, using just a Windows machine for compiling.
Requirements
-
For 4.9.X or older, you need Visual Studio Community Edition 2013
-
For 4.10 or newer, you need Visual Studio Community Edition 2015
-
Unreal Engine 4 compiled from source code
-
Project must be a C++ code project
- If your project is a Blueprint Only project, follow this tutorial to wrap it in C++. Don't worry, you won't have to write any code.
-
Linux Toolchain for Windows installed for Linux x86 Server Support
Adding Dedicated Server Support
Note: The word Project in any referenced file name or code will refer to your project's name. For example, my project for this tutorial is named GenShooter, so in my case Project.Target.cs refers to GenShooter.Target.cs. ProjectTarget in my case would be GenShooterTarget.
- Navigate to your Project's Source folder. You should see some
.Target.csfiles.
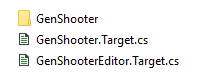
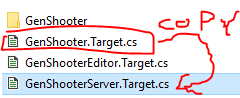
- Make a copy of
Project.Target.csfile and rename itProjectServer.Target.cs, be sure not to grabProjectEditor.Target.cs.
- Open up
ProjectServer.Target.csin your favorite text editor. I'll be using Visual Studio here. - Rename all instances of
ProjectTargettoProjectServerTarget. - Change
Type = TargetType.Game;toType = TargetType.Server;. - Save this file. Your
ProjectServer.Target.csfile should look something like this now:
// Your Copyright Text Here

using UnrealBuildTool;
using System.Collections.Generic;

public class GenShooterServerTarget : TargetRules
{
	public GenShooterServerTarget(TargetInfo Target)
	{
		Type = TargetType.Server;
	}

	//
	// TargetRules interface.
	//

	public override void SetupBinaries(
		TargetInfo Target,
		ref List<UEBuildBinaryConfiguration> OutBuildBinaryConfigurations,
		ref List<string> OutExtraModuleNames
		)
	{
		OutExtraModuleNames.AddRange( new string[] { "GenShooter" } );
	}
}
Building your Dedicated Server
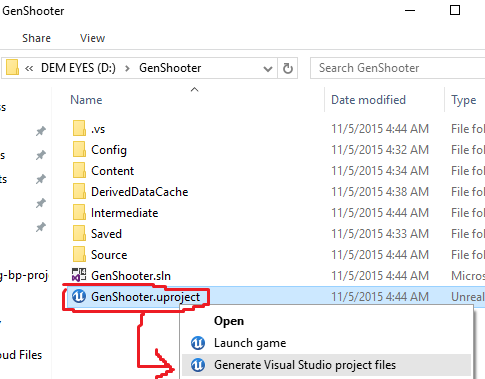
- Right-click your project's
.uprojectfile in your project's folder and "Generate Visual Studio project files".
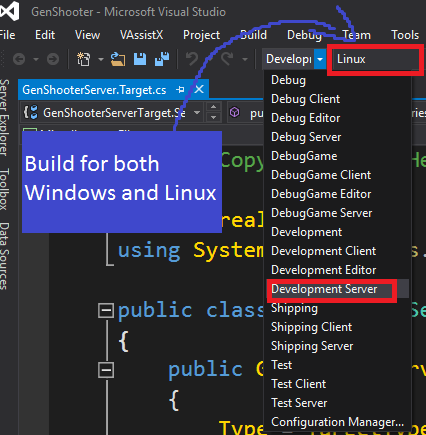
- Now we need to build our project in Visual Studio with the
Development Serverconfiguration for the Windows platform, and for the Linux platform as well if you have the Linux x86 Cross-Compile Toolchain installed. To do this, build your game project just as we built it in the past tutorials but this time with theDevelopment Serverbuild configuration.
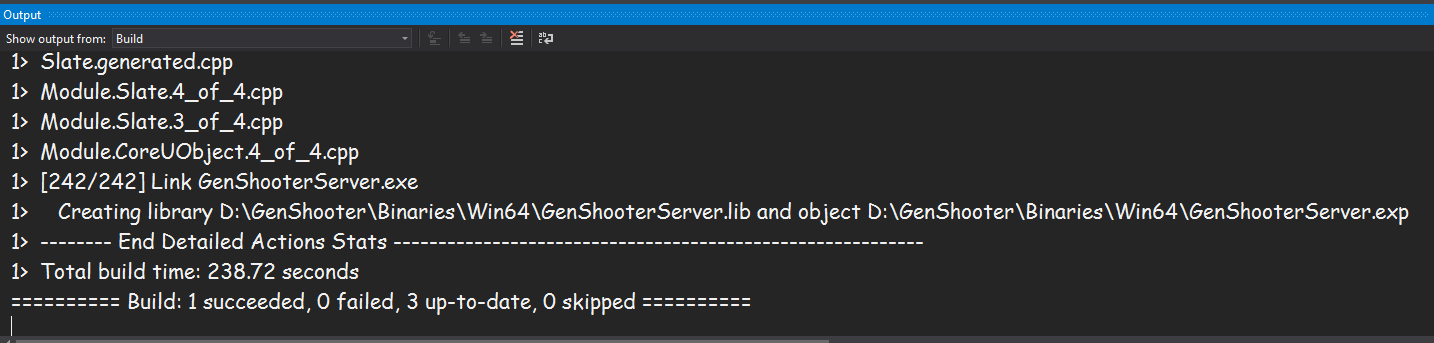
When the Windows server is done building, your output should look like this.
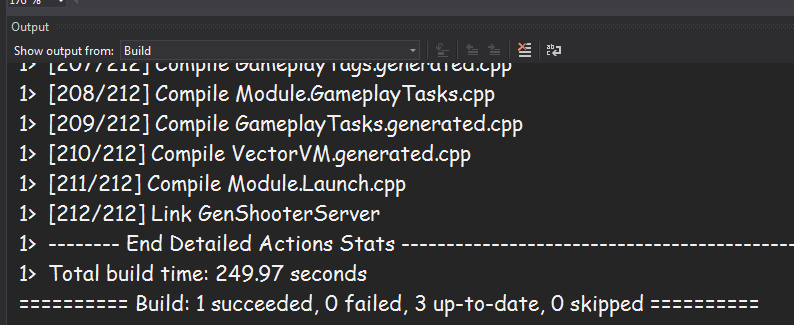
Here is the build output for the Linux server.
Now your project supports building for dedicated servers, for all platforms, including Linux. Whether Linux will compile is dependant on if your Linux x86 Cross-Compile Toolchain is setup correctly.
Packaging Your Dedicated Server
- Open up your project in the UE4 Editor.
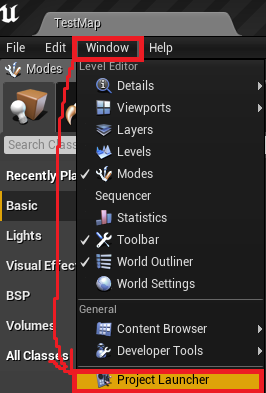
- Open up the Project Launcher using Window -> Project Launcher.
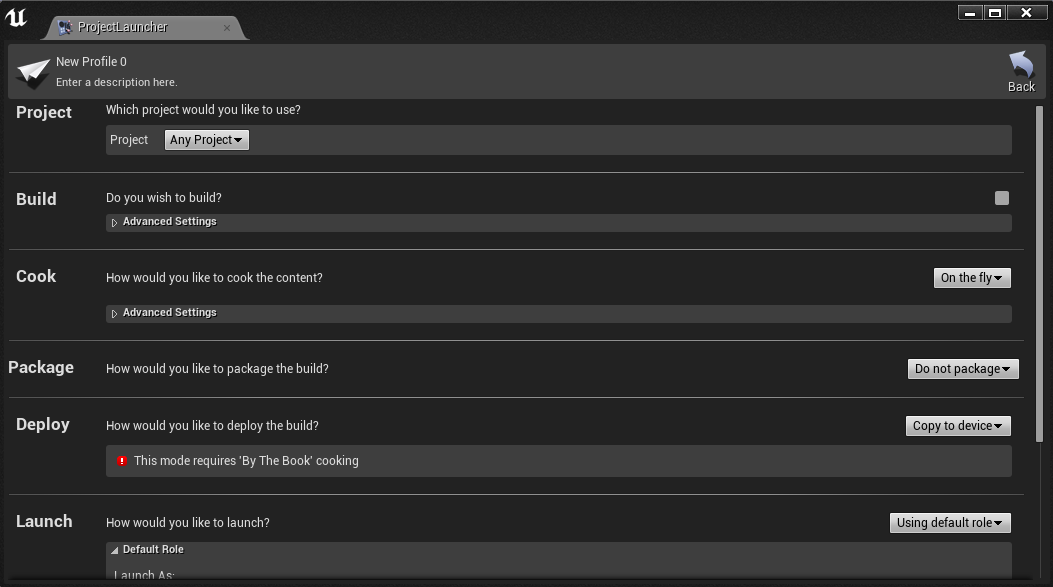
This should greet you with a window that looks like this.
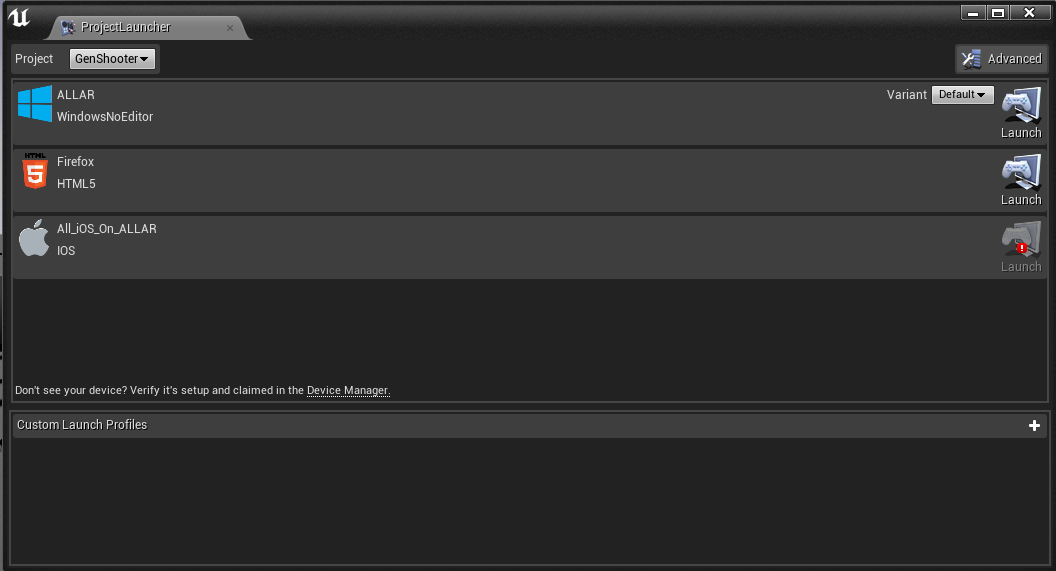
This window allows for launching various project deployment configurations.
- To build your project in dedicated server form, we need to make a custom build profile. Click the "Add a new custom launch profile" button in the bottom panel that looks like a plus sign. This should open up the custom profile editing screen.
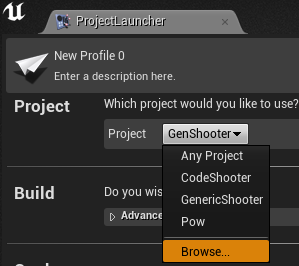
- Choose your Project in the Project drop down. If you do not see it, click browse and feed it your project's .uproject file.
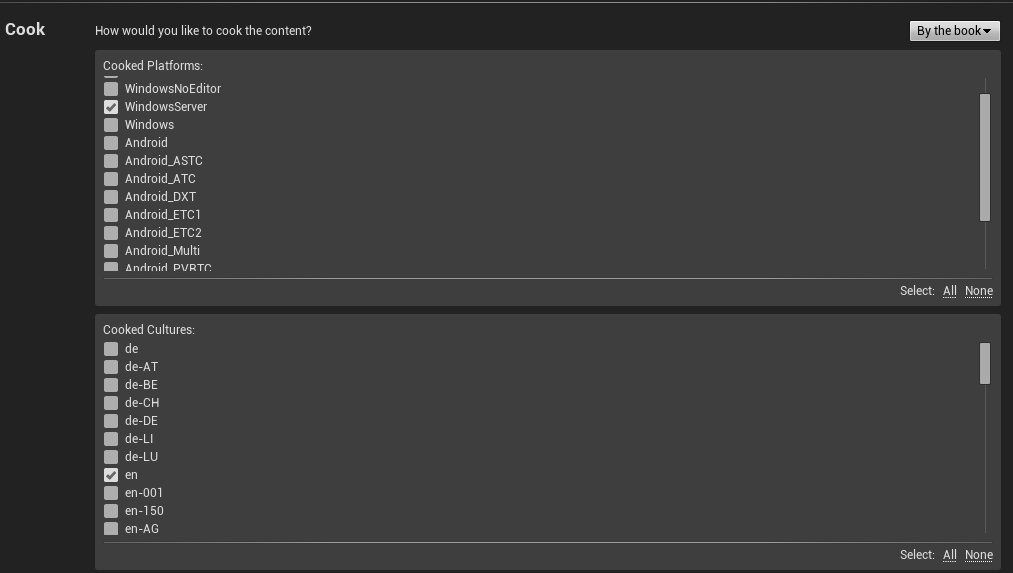
- Change Cook mode from
On the flytoBy the Book. Select theWindowsServerplatform under Cooked Platforms. Select theLinuxServerplatform as well if you have the Linux x86 Cross-Compile Toolchain installed. Also, selectenunder Cooked Cultures, or select your base language if your project is not English centric. Click here to see what these settings look like.
- Change Package mode from
Do not packagetoPackage & store locally. Leave all the settings in here blank by default.

- Change Deploy mode to
Do not deploy.

- Click "Back" on the top right of this window to go back to the main Project Launcher Window.
- Click the "Launch This Profile" button next to your new custom profile. This button looks like the Play button in the level editor window.

- This will begin the process of cooking and packaging your dedicated servers for your selected platforms. This will take a while. When it is done, it should look like this.

Locating your Dedicated Server Builds
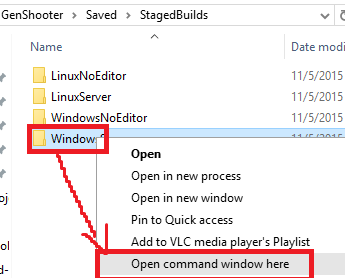
Now that you have packaged your dedicated server builds, you can find them in your project's Saved\StagedBuild directory. If you have packaged your regular game builds, you'll see them listed here as WindowsNoEditor and LinuxNoEditor as well. You are free to copy these builds to your target machines and distribute them as you like.
Note about running the Windows Dedicated Server
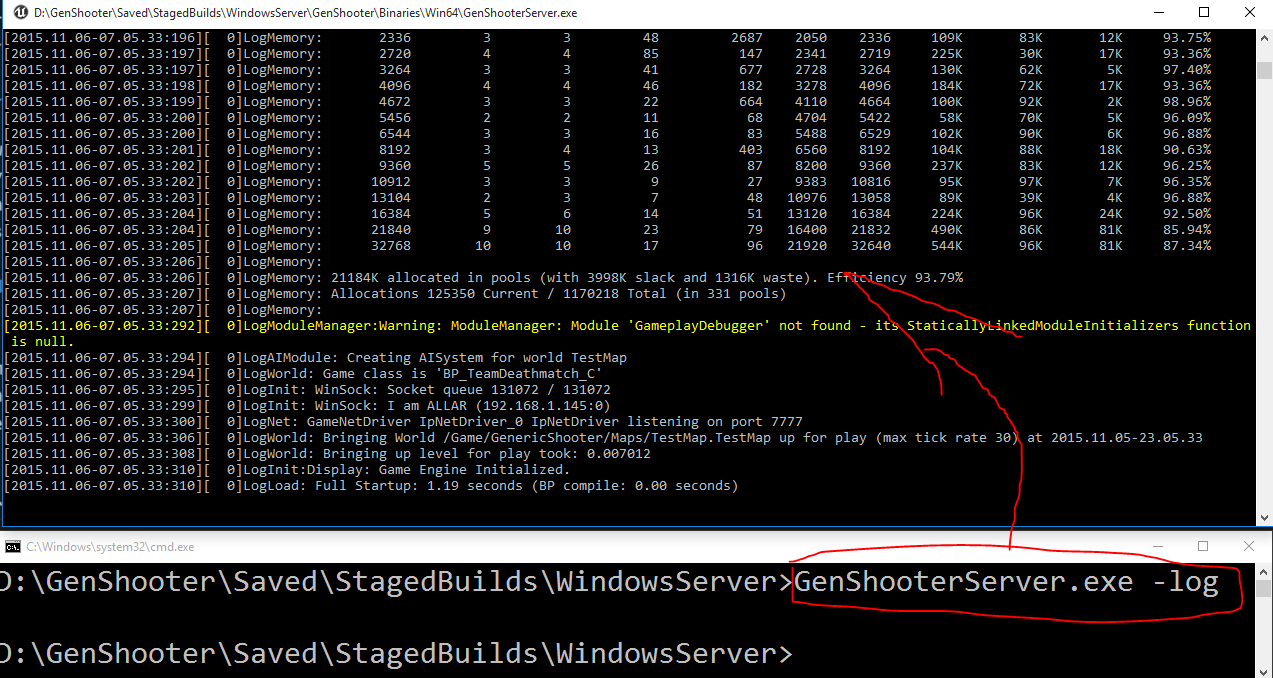
If you load the Windows Dedicated Server, it will seem that nothing loads up and that there is no UI or command prompt of any kind. If you open up your Windows Task Manager, you will see that your server is in fact running, but it is invisible. If you would like to see the log output of your Windows Dedicated Server, you need to run it with the -log command argument. The easiest way to do this is:
- Hold Shift and Right-click the folder your Windows Dedicated Server is in and choose "Open command window here."
- Type in
ProjectServer.exe -logand hitEnter. In my case, this is namedGenShooterServer.exe -log - This will load your Windows Dedicated Server with a log window.
Note about running the Linux Dedicated Server
After copying your files to your Linux server (which is outside the scope of this tutorial), you will need to run ProjectServer located in your builds Project/Binaries/Linux/ folder.
In my case that is, loading it from a terminal would look like:
GenShooter/Binaries/Linux/GenShooterServer
If you want to load it and then send it to the background so that it will not terminate when you close your terminal session, you can load it with:
nohup GenShooter/Binaries/Linux/GenShooterServer &
To kill a server that has been sent to the background, find it's process name using the command top, then route that name to pkill, which would look like this:
pkill GenShooterServe
Your process name is usually your server binary's name limited to 16 characters.